How to assemble an oil heater. Assembling an oil heater is actually very easy, once you understand how it’s done. Since there are only confusing resources online, I created this helpful picture guide with real-life pictures.
Just recently I received an oil-filled radiator myself. I did not even know that I have to assemble it myself. This presented itself as an opportunity for writing this article.
Quick answer: Assembling an oil heater is simple. First, attach the wheels to the brackets. Then use the bent metal connectors to attach the brackets (with wheels) to the bottom of the oil heater. Place the oil heater upright. Wait a minute for the oil to flow down. And then turn the oil heater on.
This was just a quick text instruction. Don’t worry if you didn’t understand it yet. Images speak a thousand words. So let’s have a look at what to do in real life.
Picture instructions to assemble an oil heater
In this section, I am listing all the pictures I have taken when I assembled my new oil heater so you can follow along.
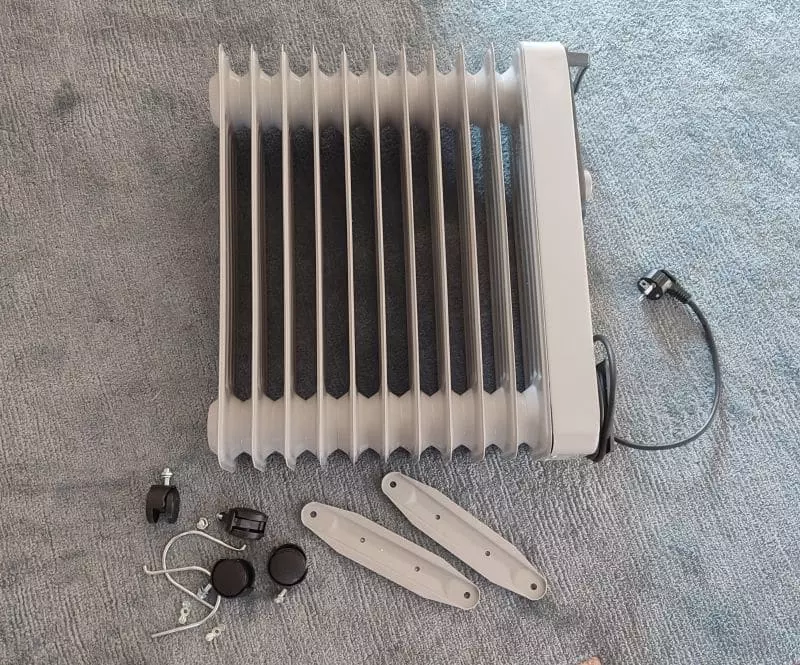
1. Unpack the oil heater package contents
 Top: Big metal oil heater. Lower left: Wheels and bent metal pieces. Lower right: Metal brackets.
In the picture, you can see several things lying around. First, and most notably, you can see the big metal oil-filled radiator with a power cable attached. This piece is already fully assembled and you don’t need to worry about it.
All we have to do is to assemble the wheels and attach them to this metal body.
Below the heater, you can see wheels (with nuts and bolts), two “brackets” (the thin metal pieces with 4 drilled holes), and 2 bent “metal sticks”.
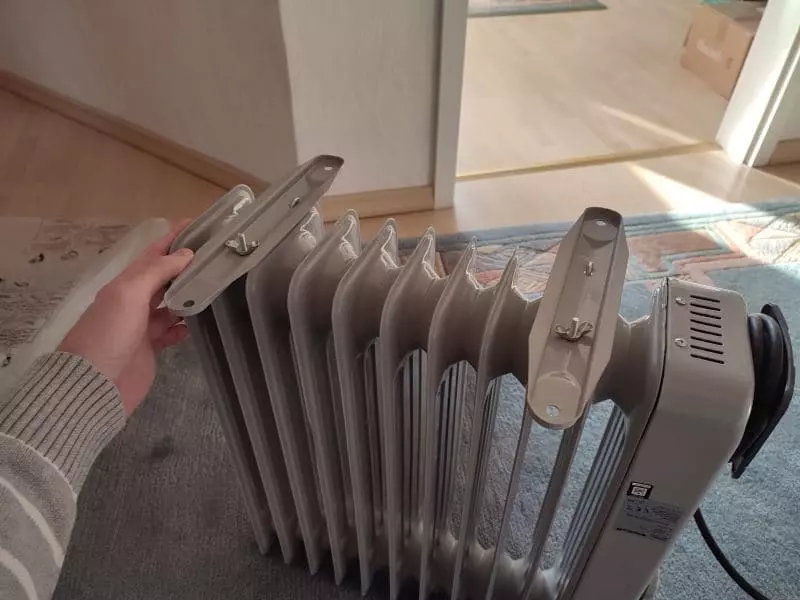
2. Place the bent metal pieces between the oil heater ribs
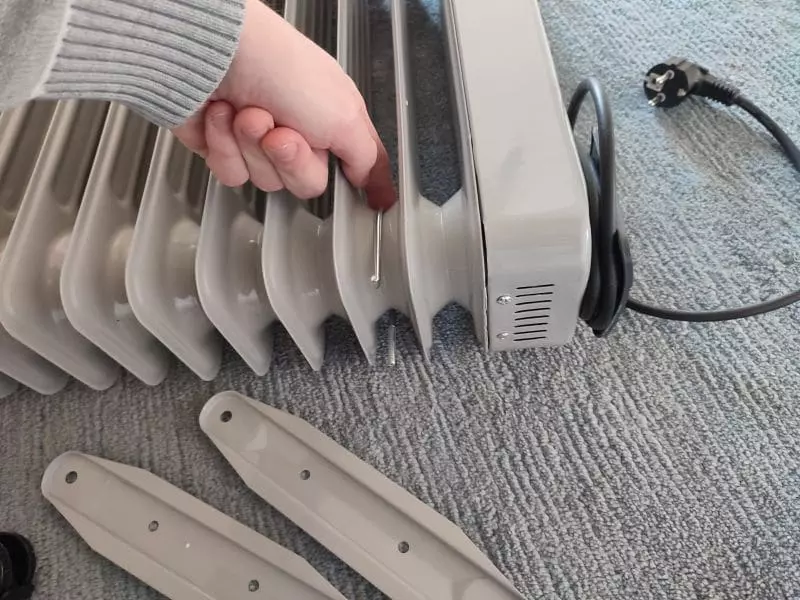 Place the bent metal piece behind one of the lower right columns of the oil heater. I chose the second outermost. But you can also use the outermost (which is probably better).
Place one bent metal stick behind the bottom pipe of the oil-filled radiator in the first “opening” (column / between the ribs) behind the front side of the heater.
3. Attach the wheel-bracket to the heater
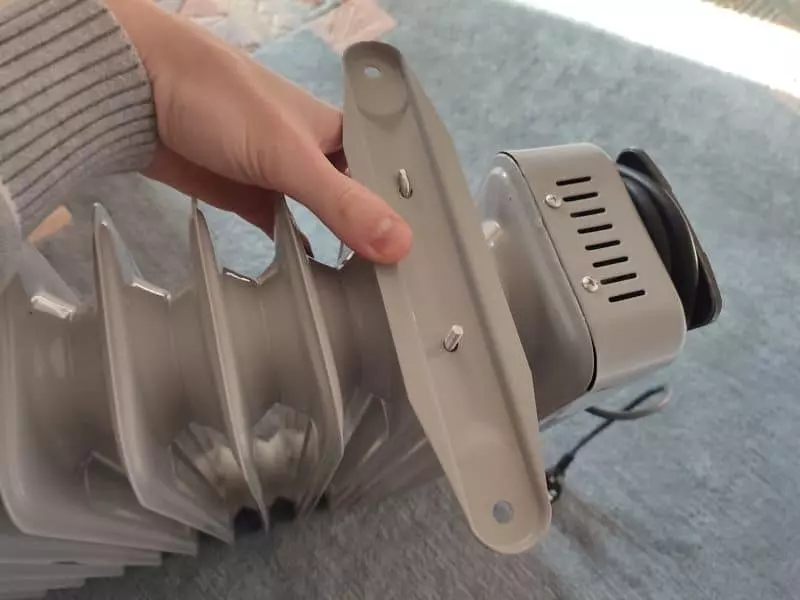 Place one of the brackets onto the bent metal stick.
Stand the oil-filled upright (bottom side up) and put one of the two brackets onto both ends of the bent metal stick. The hollow side of the brackets must point away from the oil-filled radiator’s body.
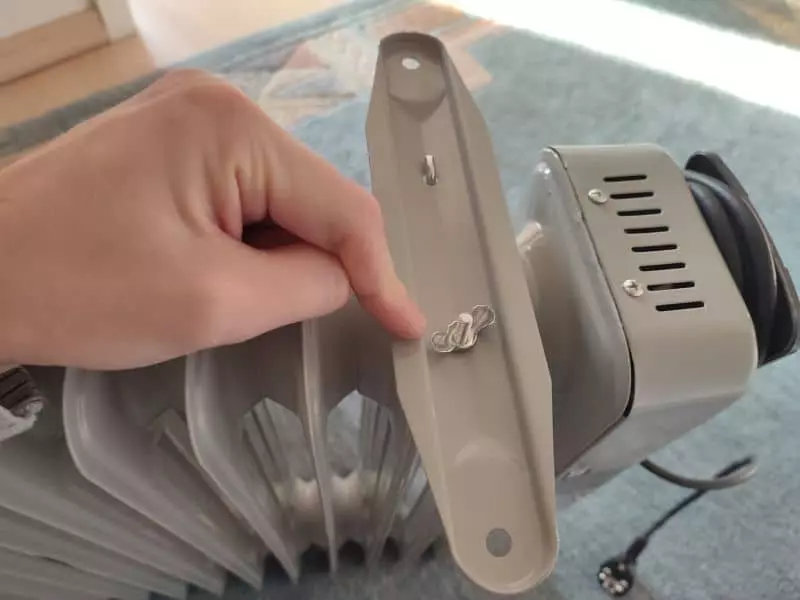 Use the nut to fix the bracket to the heater. Note: Don’t screw too tightly.
One end of the bent metal piece has a screw thread. This end of the bent metal stick has to be attached to the bracket using a nut that you screw down. Don’t screw it too tightly. The nut is (in my case) made of thin material and it looks very easy to break. Rather, screw the nut down until you notice a good resistance, but you can still easily unscrew it.
The other end of the bent metal piece has no screw thread. Since it is a bent end, it holds onto the bracket on its own. This may differ from model to model. If your bent metal stick has screw threads on both ends, then use nuts to attach both ends to the bracket.
4. Repeat for the other side
Repeat step 4 for the other bracket. This time, attach the bracket to the outermost column on the other side of the heater.
5. Screw on the wheels
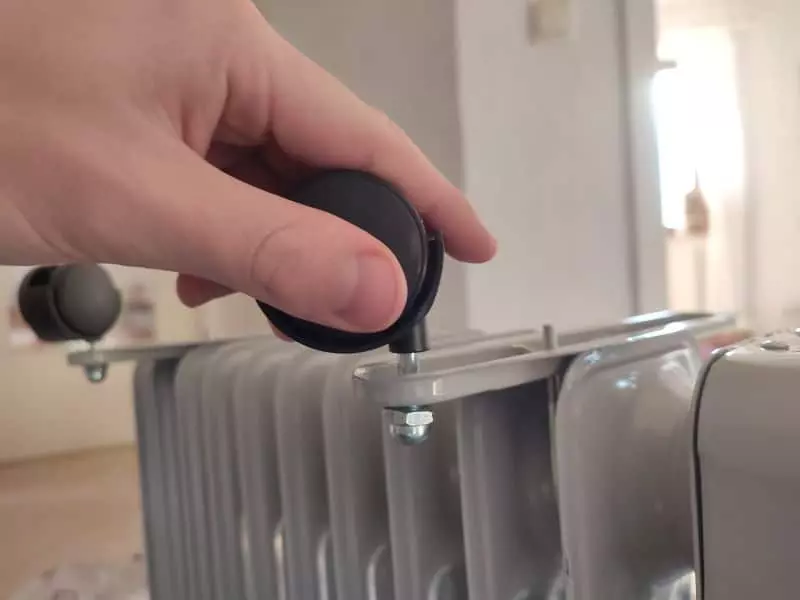
Now use the additional nuts and bolts to connect the wheels to the outermost drilled holes on the brackets. Pay attention to the direction the wheels are facing. If you followed this guide, the heater is standing bottom side up. Therefore the wheels have to point upwards.
I am emphasizing this because I attached the wheels to the other side of the brackets and ended up having to unscrew everything again.
6. Turn over the oil heater and wait for the oil to settle
Now you are almost finished! Turn the heater upside once more so the wheels are facing downward. Now, you should hear oil flowing around. Because we flipped the heater upside down in the beginning, the oil is moving to its original place again. Give the oil a minute to settle.
After a minute, once the oil settled, you can turn the heater on for the first time!
Also, you can test your oil heater assembly by rolling the heater around on the floor. It should move easily on the blank floor. If you have a carpet, the rolling around will be a little harder of course.
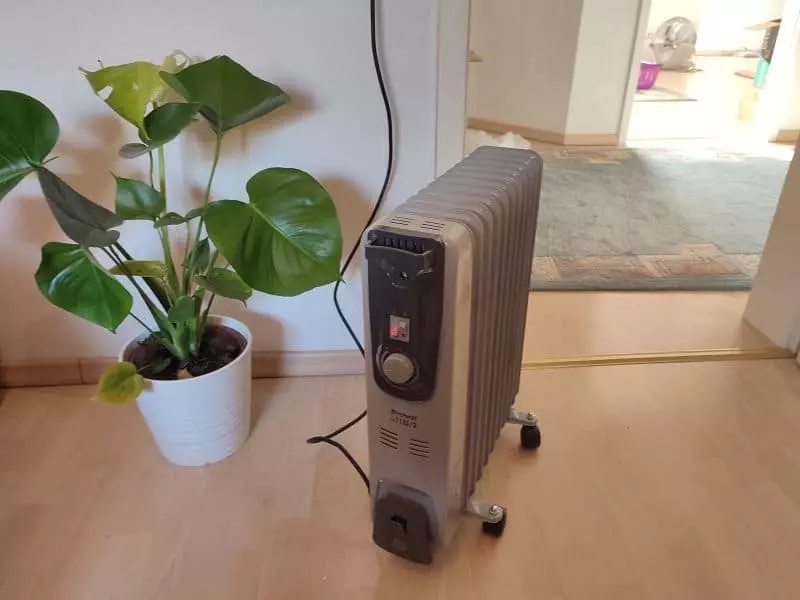
Position the heater in a good spot
Oil heaters heat through convection. This means that they produce hot air that transports the heat. By positioning the oil heater wisely you can improve the hot airflow.
Usually, it is best to place an oil heater either below a window or in the middle of a room. When an oil heater produces heat standing below a window, the cold air from the window “pushes” the warm air into the room.
On the other hand, if you decide to place your oil heater in the middle of your room, the hot air rising from the heater and reflecting from the ceiling forms a “heat mushroom”.
This heat mushroom is inevitable. All heaters that don’t have a fan or infrared radiation cause “heat mushrooms”. By positioning the heater in a good spot, you can use this mushroom-shaped heat flow to your advantage.
Why do oil heaters have to be assembled?
Now that your heater is fully assembled you might wonder why you even have to do this. And it is a good question. In the end, wheels could be built into the oil heater.
The main problems are the dimensions and weight of the oil heater. Oil heaters have a tower-like shape. Also, they are heavy. This shape and weight combination causes them to be very sensitive to sideways forces. In simple language: Oil heaters tip over easily.
To reduce the risk of a tip-over, the wheels have to be as far apart from each other as possible. However, just increasing the width of the wheel construction would also increase the volume of the packaging and increase shipping costs.
Therefore, oil heater manufacturers usually decide to deliver the oil heater not fully assembled. It simply saves them money.
Potential issues during oil heater assembly
The quality of the metal brackets and the plastic wheels is not very good on most oil heaters. For that reason, you should be very careful when assembling the heater. This “cheap wheels”-phenomenon is apparent in all price ranges of oil heaters. But the cheaper the heater, the worse it usually gets.
Therefore be careful when you screw the wheels onto the brackets. The wheels easily break. My oil heater wheels arrived with a plastic part already broken off on one wheel. It’s not critical, but not nice either.
And also be careful when you screw the nuts and bolts together. The nuts, in my case, are very thin and I am 100% certain they break off if I screw them too tightly. An old german saying is:
“After tight comes broken”
old german saying
Therefore be careful when you assemble your heater. The wheel assembly parts are not very solid and it’s better to be careful than to be sorry.
Conclusion
Oil heaters are not hard to assemble. In this guide, I showed you how to assemble an oil heater. Just follow the picture guide above.
The oil-filled radiator assembly manual works for all oil heaters.
I hope this article helped you assemble your heater!