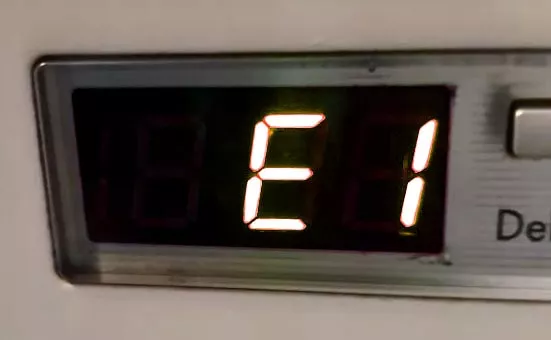
Your electric heater displays an E1 error code and you don’t know what to do? Worst of all, it stopped heating altogether and you can’t get it to run anymore?
Don’t worry. The E1 error is usually simple to fix.
Hi, my name is Daniel, I am an electrical engineer, and in the past, I repaired electronics professionally.
Let’s have a look at the issue together.
Why your Electric Heater shows an “E1” Error Code
What does “E1” Mean?
E1, standing for “Error 1”, often indicates an issue with the thermal cutoff switch or the thermostat in many electric heaters.
As an error code, “E1” is very popular. It stands for “Error 1”. So, it is the first error code programmed into your electric heater.
Imagine you are an engineer and your task is to program error codes. Most of the time, you start with E1.
Unfortunately, E1 can technically mean anything, depending on the heater brand and model. But we can narrow down the cause of the E1 error code significantly, just by thinking about it:
- The issue is not related to the power supply: If it was a power supply issue, likely the display would not turn on at all.
- Your heater senses the issue: If your heater couldn’t sense the issue, it wouldn’t display it. There is a high chance that the E1 error code is related to a sensor inside your heater (thermostat or a safety switch).
With these two assumptions, we can make a good educated guess:
What causes the E1 Error?
- Overheating: Heaters have built-in safety features that will shut them off when they get too hot. An E1 error can be the heater’s way of telling you this safety feature has been triggered.
Your heater senses the overheating through a temperature sensor inside the its case. We’ll have a look at that later. - Loose Wires: Connections inside the heater can sometimes become loose, especially if the heater has been moved around a lot.
For example, this could be a disconnected wire connecting the temperature sensor to the built-in thermostat. - Faulty Components: Over time, parts inside the heater can wear out or become defective.
Of those three causes, the overheating is the most likely. In most heaters, especially those with built-in fans, dust accumulates over time.
At some point, the dust inside the heater blocks airflow and causes overheating.
But it might just as well be another issue.
Is the E1 Error Worth Fixing?
If you have basic electronics knowledge, you should be able to fix the E1 error yourself.
If you, however, lack the skills or the tools to open up and inspect your heater, I recommend saving yourself the trouble and potential danger of doing so.
Of course, it depends on which device of yours shows the E1 error. If it’s a simple space heater, I recommend just getting a new heater, at least until the E1 error is fixed:
My favorite infrared heater is the Dr. Infrared Heater DR-998 (click here to view it on amazon).
It can reliably heat even large living rooms during the winter. So, it’s a great backup heater to have anyways!
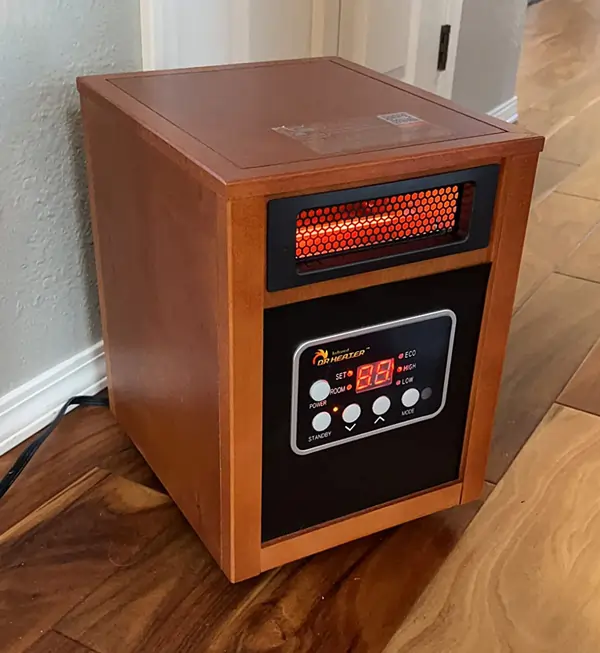 The Dr. Infrared DR-998 is a great heater that you can rely on when your main heater fails!
If the heater that shows the E1 error is a larger system such as a domestic heater or a water boiler, I recommend trying to check the issue yourself first. Quite possibly, it’s simpler to solve than you think with the troubleshooting steps below.
If that doesn’t work (don’t spend too much time if you hate fixing stuff), then hire an electrician.
How to Fix the E1 Error Code in Your Electric Heater
Let’s have a look at how to fix the E1 error code in most electric heaters.
1. Open up your Heater
In any case, you need to have a look at the internal circuitry of your electric heater.
To do that, unplug your heater from its power supply first.
Then, open up the back panel of your heater. Usually, you need a screwdriver or a hex key to do that.
Disassemble your heater until you can easily reach inside. You need to be able to see everything clearly.
Also, get a lamp for better lighting.
2. Clean out Dust to Prevent Overheating
Now, there are two scenarios:
Either your heater is perfectly clean inside, or you see thick layers of dust covering the heating element and the built-in fan.
If you can’t locate the heating element, remove the fan from its base. Usually, the heating element is right below the fan.
If your heater is clean inside, check whether it has a built-in air filter that collects all the dust. If there is an air filter, clean it (check the next section).
In case your heater is dust-free and there’s no air filter, the E1 error code is unlikely to come from an actual overheating.
( It might still come from “virtual” overheating, triggered by wrong sensor readings - we’ll have a look at that as well )
But if your heater is clogged with dust, remove all the dust from its inside.
To do that, you can first pull off the thickest layers of dust with your bare hands. Then, use a dry brush (or an old toothbrush) or compressed air to get rid of the finer dust layers.
Once your heater is dust-free, turn it on and see if the E1 error shows. Likely, it is gone.
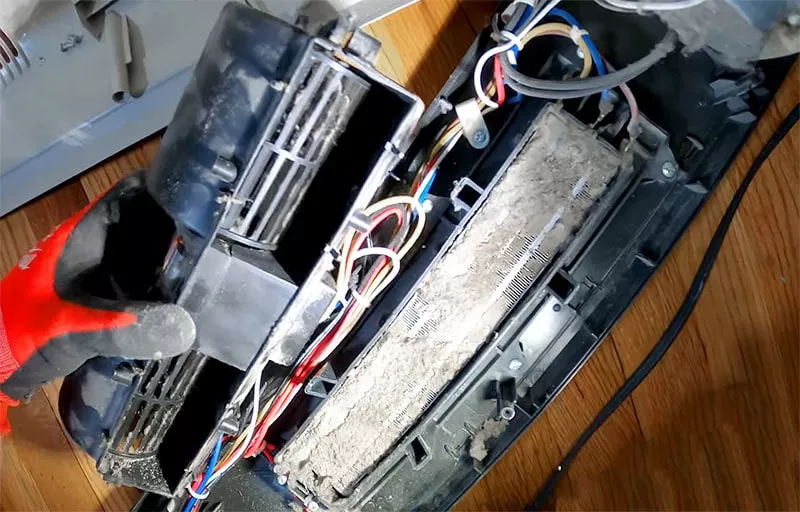 Here’s what a clogged space heater looks like. As you can see, the heating element is fully covered under a thick layer of dust.
If your heater still shows the E1, continue with the next troubleshooting steps.
3. Clean or Replace Filters to Allow Free Airflow
Some electric heaters have built-in air filters. These accumulate dust over time until the filter is clogged and blocks airflow.
Please note that only a few electric heaters have built-in air filters. If your heater doesn’t have any, just skip this step.
The lack of airflow then causes your heater to overheat.
To fix this, take out the air filter of your electric heater, remove the dust, and put it back in place.
Alternatively, replace the filters.
Check if the E1 error persists.
4. Check Temperature Sensors
By now, your heater should be fully cleaned. If it’s still showing the E1 error, the thermostat’s temperature sensor could be faulty.
Here’s a quick check:
Turn on your electric heater. You should see the E1 error now. Is it possible to view a current room temperature reading regardless?
If yes, check the displayed temperature. Does it make sense or is it off?
If the temperature reading is off, your thermostat’s temperature sensor is faulty.
In many heaters, you can’t test this as easily, unfortunately, because either they don’t have a “current room temperature” display, or the E1 error hides the desired display.
In this case, check the temperature sensor manually. Open up the heater’s back side. Locate the temperature sensor. Usually, it’s a small metal piece attached to the inside of the heater’s case through lengthy, but thin wires.
Here’s an image for reference:
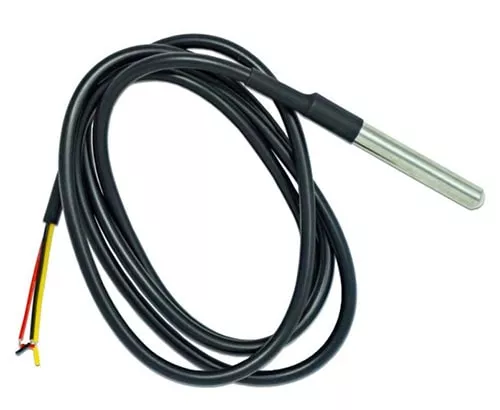 A thermostat temperature sensor. In smaller heaters such as electric space heaters, they might have smaller sensor heads. But in general, it’s a metal head piece connected via wire to the rest of the heater.
Ensure the sensor wires are properly connected at both ends.
If you can, using a multimeter, measure the voltage across the two wires with varying temperatures. You can use a lighter to heat up the metal sensor. The voltage should be higher than when the sensor is cool.
If the voltage changes, also confirm that the changing voltage arrives at your heater’s thermostat circuitry. If it does, the sensor is working and does not cause the E1 error code.
Else, if the voltage vanishes somewhere, there might be an open or short circuit somewhere.
If if the voltage doesn’t change, the temperature sensor is broken and needs replacement.
6. Replace the Thermal Cutoff Switch
Most electric heaters have a built-in thermal cutoff switch that signals to shut off the heater. The thermal cutoff switch resembles the overheat protection.
The thermal cutoff switch looks similar to a thermostat. It’s usually a metal or ceramic headpiece mounted somewhere inside your heater.
The thermal cutoff switch closes the electric heating circuit when the heater’s temperature is below the overheating cutoff temperature.
When the temperature surpasses the cutoff temperature, it opens the circuit and cuts off the power supply.
So, it’s a simple switch. And you can test it with a multimeter with a simple continuity test.
Locate the thermal cutoff switch inside your electric heater and check that the circuit is closed (when the heater is cool).
If it’s not, replace it.
A trick:
If your heater keeps cutting off and signaling E1 with that switch, even though it appears to be working correctly, you can replace it with a cutoff switch with a higher cutoff temperature rating.
But please only do this if you know what you’re doing and you are sure your heater is otherwise operating correctly.
Don’t do this with electric water boilers, since higher cutoff temperature can lead to dangerous pressure buildup!
5. Connect Loose Wires
Next, look for any wires that might have become disconnected from any component on the heater’s circuitry.
If you find any loose connections, reconnect them. If the connection point broke, you might have to replace the entire wire or even the connector.
The wires and connectors inside heaters are usually simple to replace. You can find replacement parts in any electronic hardware store or online.
For the replacement, you need a soldering iron.
If you can’t replace a torn-off wire yourself, hire someone or ask a knowledgeable friend or family member to do it for you.
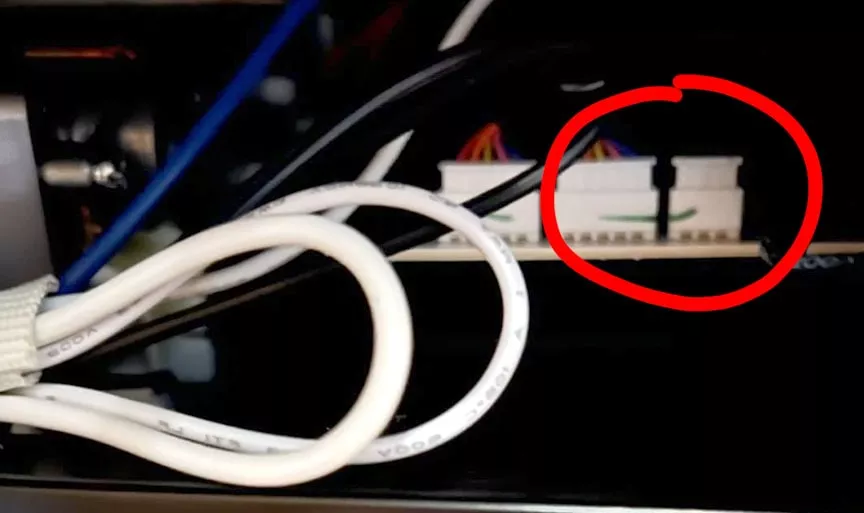 Make sure you check that connectors like these are connected firmly!
7. Inspect Other Components:
If after cleaning out the dust, and checking all sensors and wires, the E1 error still persists, the issue is likely an electronic or a software issue that’s harder to locate.
Working in an electronics repair department I learned one thing: You can spot 90% of electric issues visually. You don’t need multimeter troubleshooting skills.
Of course, if you know what to do, go ahead.
Here’s what I’d do:
Set up a bright lamp and get a magnifying glass. Set a 5-minute timer.
During the 5 minutes, just stare at the electric circuitry. Look out for
- blown parts
- parts with burn marks around them
- disconnected or hovering parts (parts not connecting to their dedicated solder joint)
- missing parts (be careful: sometimes, there are intentional blank spots on circuit boards where one could solder a component onto - but when a part is missing it is usually evident)
Usually, you will quickly find the cause of the issue.
Once detected, identify the affected part and buy a matching replacement.
For identification of burnt parts (where you can’t read the labels anymore), you can look for a matching part nearby. Oftentimes, there are multiple parts of the same sort on the same circuit board.
7. Reset the Heater
So far, you checked all the possible causes of the issue. If the issue still persists, even after checking and solving all the potential causes described earlier, it could be that the E1 error code is stuck and waiting to be reset manually.
Some electric heaters don’t reset error codes on their own and keep showing the E1 error until you flag the issue as solved.
To reset the E1 error, oftentimes power cycling your electric heater should be sufficient. That is, turn on and off your heater 5-10 times.
Also, look for a reset button on the bottom of the heater. Or a small poke-through hole with an embedded reset button (similar to many old electronic devices) you can only push with a needle.
If that doesn’t do it, check your electric heater’s manual for a reset procedure and follow it.
Experts Only: Temporary Workarounds to Run Your Heater Despite the E1 Error
There are a few hacks to get rid of the E1 error code. These are not safe and you should not use them around your family, since they decrease your heater’s safety.
Only use them with smaller portable electric heaters and avoid using them in large domestic heating systems.
Knowledge is power, but it can be dangerous as well.
For the following hacks, I assume you know your heater very well.
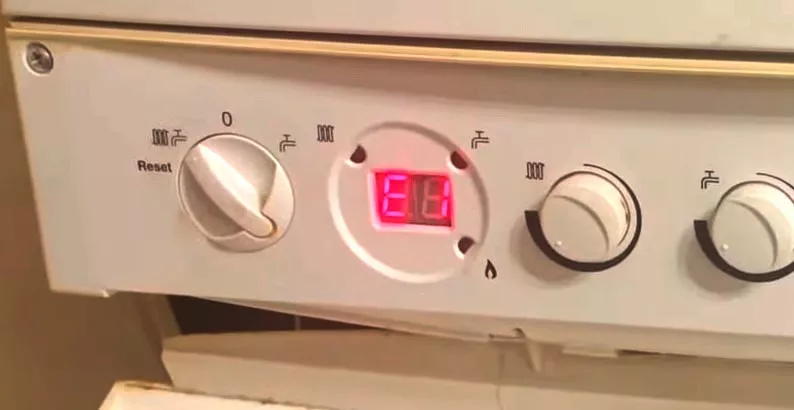 Especially when you work with a larger-scale electric heater such as a water boiler (as in the image above), you have to know what you’re doing. Otherwise, hire a technician. There’s just too much that can go wrong.
Quite recently, I almost blew up my water boiler because I tried to fix something myself that I wasn’t very familiar with. It ended up in a pressure buildup and a blown pipe.
Remove the Overheat Protection
If the E1 error comes from your heater’s overheat protection triggering too early you can remove the overheat protection mechanism.
For example, if it’s a thermal cutoff switch, replace it with a continuous wire.
Check the overheat protection mechanism of your heater and remove it properly.
Removing the overheat protection is only safe if you dust-clean your heater every 3-6 months and you run it at moderate temperatures.
Remove the Thermostat’s Temperature Sensor
Similarly, you can remove the thermostat’s temperature sensor. Depending on how the thermostat is implemented, your heater stops working completely without the temperature sensor, or it heats a lot more.
The absence of a temperature sensor can either signal to the thermostat that your room is very cold (in which case the heater will continue heating), or very hot (in which case the heater will stop).
See if that gets rid of the E1 error code.
Generally, removing the thermostat’s temperature sensor might remove the E1 error code and get the heater working again. But it’s only an emergency solution for a heating outage in the freezing winter. Replace the sensor with a working one as soon as possible.
Harvest parts from a defective heater
Thirdly, you can buy a defective matching heater on a marketplace website such as eBay or Craigslist.
Then, disassemble the defective heater and use it for replacement parts.
This way you can replace individual components of your heater showing the E1 error and see whether the E1 error disappears.
I recommend doing individual replacements, for example:
Try replacing the overheat protection only. If that doesn’t solve the problem, reinstall the original overheat protection. Then, replace another part. If it doesn’t solve E1, reinstall the original part again.
This way, you ensure that you don’t install a defective part from the defective heater and you end up with two broken devices.
This hack takes a lot of time, work, and knowledge. So, I recommend this only if you enjoy fixing this and the heater repair is not urgent.
Conclusion
Fixing the E1 error on an electric space heater can be straightforward, especially with some knowledge and the right tools.
Usually, the source of the E1 error code is overheating due to dust accumulation, a faulty temperature sensor, or a faulty thermal cutoff switch.
All of these issues are fixable.
If, after fixing the source of the issue, the E1 error persists, try to reset your heater.
Remember to always prioritize safety when working with electrical devices.
Once you’ve addressed the error, your heater should be back to keeping your space warm and cozy.