How to remove mold in a portable air conditioner? AC units provide the perfect conditions for mold to grow-oxygen, moisture and matter. And since they push air around your house, it means a moldy air conditioner will be blowing microscopic mold spores into the air you breathe.
If you suspect there could be mold in your portable AC, either because of seeing or smelling it, this article will help you solve that problem once and for all. But here’s the summary.
Quick answer: You can remove mold in a portable air conditioner by cleaning the internals with a special mold cleaner. Wear protective attire such as goggles, gloves, and a mask, and then open the AC unit to inspect the inside and clean the components using AC cleaning brushes.
Let’s have a look at the exact steps to remove mold from your portable AC.
How to Open a Portable Air Conditioner to Check for Mold
To know the full extent of the mold growth, you need to open and take apart the portable AC so you can see inside.
But before that, turn off the AC, unplug it from the power source and take the unit outside. Be sure to wear protective gear before touching the unit to protect yourself from exposure.
It’s best to take care of mold outside where you have plenty of fresh air to avoid distributing mold fumes in the house.
Some of the cleaners you will use are also not the safest to inhale, not to mention you will need to blow dust and debris out of the AC unit. To be safe, place the unit on an outdoor working bench or any stable elevated surface.
Now that you have the unit outside in a safe space, it’s time to open it up.
Open the front grille
Remove the front grille of the AC unit by pulling it forward and slightly pushing it down. This should be easy enough unless the grille is screwed in. If that’s the case, use a screwdriver to take off the screws and let the grille free.
Remove the filter
Take out the filter. The filter is the first thing you will see when the grille is out. Pull out the filter and put it aside for cleaning or disposal.
Remove the front panel
Remove the front panel. When you remove the filter, a metal front panel that locks in all the other AC components comes into sight. You need to pop this open as well by pulling it upwards or using a screwdriver if it’s screwed shut. The panel may be stuck a bit if you have never opened the unit so use some force or wedge it gently with a screwdriver. Keep track of the screws to avoid losing them.
Optional: Take apart your AC further
Take apart the AC unit. This point is optional and depends on the extent of mold growth. If it’s mild and you can’t see any traces back there, you can do the cleaning as it is now. Otherwise, take off the screws holding the AC unit to the cabinet cover to release the unit. AC components are heavy and delicate, so you must be careful and possibly have someone to help with the cleaning.
Look at the parts. With the AC unit fully open and bare, you can clearly see the evaporator, the condenser, and every other part. These are the areas where mold will be hiding. If you’ve never seen a condenser or evaporator before, they usually have aluminum fins around them for protection.
Which Tools Do You Need to Remove Mold in a Portable Air Conditioner?
Ready to clean up the mold now? Here’s what you need before we start.
Removing mold from a portable air conditioner requires a few special tools and products. Here’s the AC cleaning supply list;
- Water
- CLR or other mold removal cleaner
- Mild dish soap and bleach
- A bucket
- Clean cloth
- Scrub brush
- A vacuum cleaner with attachments
Steps to Remove Mold from Your Portable AC
Removing mold from a portable AC is a vigorous, though not difficult process. Once you identify the places where mold is growing and the possible causes, it’s easy to clean up from there.
Drain the Water
Air conditioners, including your portable unit, remove moisture and heat from the air. That condensation then collects into a tray inside the unit and should be emptied regularly through a drain at the back. If you are lucky, your AC has a hose pipe attached to get rid of that water every time it’s full.
Clean the Filter
Again, depending on its condition, you can clean or dispose of the filter. If it’s a replaceable filter still in good condition, spray it with some mold removal cleaner and allow it to sit and soak.
Next, use your scrub brush to scrub both sides of the filter until it’s sparkling clean. Finally, rinse it with plain water and hang it to dry.
Vacuum Dust
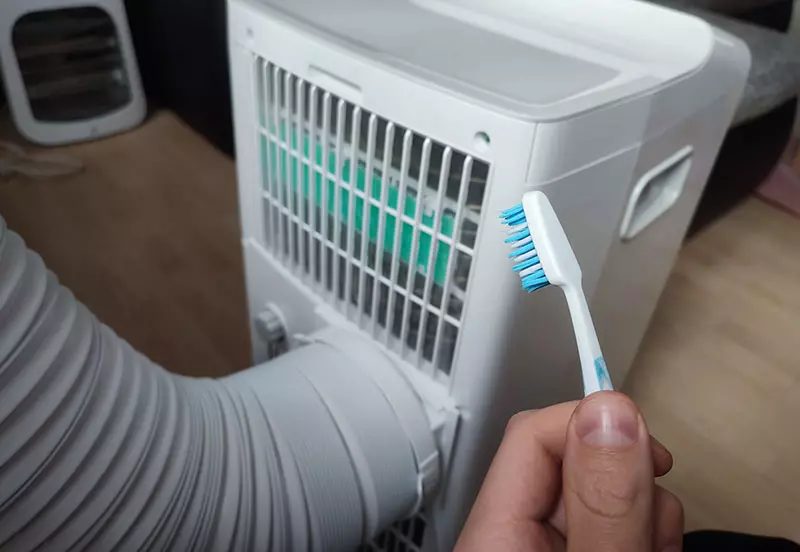
Dust and debris stuck inside your AC are organic matter feeding mold growth and restricting airflow. The dust might also prevent you from seeing the full extent of the mold, so it’s important to start by vacuuming the inside of the AC. Moreover, vacuuming will suck in most of the mold spores, leaving the AC components safe for you to clean with your hands. Use a small vacuum attachment to really get in those corners and hiding places. Also, take a soft-bristled brush and clean anything that may be stuck on the coils or the wall surface. This AC clean brush set (click here to view it on amazon) is perfect for that job.
Spray the Coils
Coils are a critical and expensive part of any AC, and they also present a perfect hiding area for mold. To remove mold from the coils, spray a liberal amount of this CLR mold cleaner (click to view it on amazon) (or your preferred cleaner) all over and let it sit there for 15 minutes or so.
Afterward, use a clean cloth and warm soapy water to wipe clean every inch of those coils and other components inside the AC. There is no proof that bleach or vinegar cleans mold better than soapy water, but you can add either of them to the water solution just for your peace of mind.
Use another clean cloth in clean water to wipe away the soapy solution and rinse the AC clean. You should then go over them with an air conditioner cleaner or apply a mold-inhibitor using a cloth.
The best mold inhibitors are found right in your home and include tea tree oil, methylated spirit, vinegar/water solution, and oil of cloves.
Clean the Exterior
While the panel and the grille are still out, take another soft, damp cloth and wipe them down thoroughly.
Allow Everything to Dry
To avoid encouraging any more mold growth, allow everything you have just cleaned to dry outside for at least 12 hours if it’s sunny and 24 hours otherwise. Once they are all good and dry, you can reassemble the unit and install it back in your room.
The steps I have outlined here will only work if the mold growth is still under control. If you open your AC and find that more than half of the unit is covered in mold, it’s better to get rid of that AC and buy another one. There’s a chance in this situation that you won’t be able to remove the mold completely, and it will grow back sooner than later.
When in doubt, consult an HVAC professional or mold expert. They will advise on whether it’s worth cleaning the mold out or just getting rid of the entire unit. After all, portable ACs are not that expensive to purchase.
How to Prevent Mold Growth in ACs in the Future
As you can see, removing mold from an AC is quite a task. You are better off preventing mold growth in the first place. But even if your AC already suffered from a mold infestation, these tips will help prevent another one.
Clean the AC Regularly
There is no way around having a clean, mold-free portable AC- you have to clean it. This starts by cleaning the filter or changing it monthly to ensure airflow within the unit. Secondly, ensure there is no standing water inside the AC by emptying the condensation tray or checking the hose. You should also open the AC periodically to vacuum the dust and clean the components. A clean, dry unit is a more efficient AC, but most importantly, it’s not conducive to mold growth.
Keep the Unit Running
When people leave their homes for a few days or weeks, they often switch the AC to save power. This however is a mistake if the weather is still hot and humid. The airflow that occurs when an AC is running prevents mold development. To save power, set the home temperature higher so the AC will run less often instead of switching it off.
Winterize the AC
Your portable AC stays off when it’s cold. This provides a perfect environment for mold growth because it’s warm and dark inside there. To prevent this, open up the unit and store the pieces in a dry place. You will assemble it again when hot weather comes back and have a clean, mold-free air conditioner.
Final Thoughts
The best way to remove mold from a portable air conditioner is by taking it apart and cleaning every inch with a mold cleaner. This is not an easy task. If that’s too much for you, I recommend hiring a professional to assess the mold damage and clean the components professionally.
That said, it is better to prevent mold growth by maintaining the AC unit regularly because mold is a dangerous fungus to live with.